CAUTION:
When installing your new Infratech heater, it is important to follow the steps CAREFULLY to avoid any shock or possible ignition. NEVER attempt to handle the heater without disconnecting all the power sources.
Since the heaters experience HIGH TEMPERATURE, it is REQUIRED that the front of the heaters are at least 3 feet away from any combustibles, drapes, electrical cords and furnishings.
The sides of the heater will need a clearance of at least 18 inches. The back of the heater will need a 6-inch clearance minimum.

For a complete guide for clearance and installation of Infratech heaters, visit our PDF here. We also have informational videos available for viewing here.
Clearance for Mounts
Wall Mount

DO NOT install heater closer than 18″ from adjacent walls and 6″ from the ceiling.
If the heater is UL Listed, then DO NOT install if the height from the floor is less than 6 feet.
If the heater is UL/CUL Listed, then DO NOT install if the height from the floor is less than 8 feet.
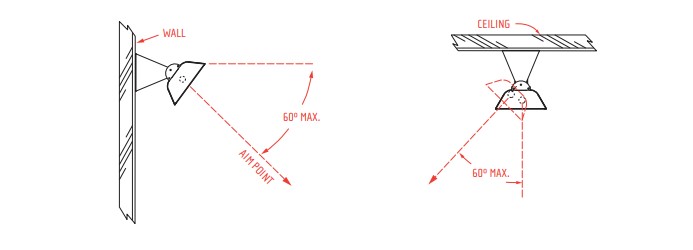
The heater must be set at a downward angle of 30 to 60 degrees.
Ceiling Mount & Flush Mount

DO NOT install heater closer than 18″ from adjacent walls and 6″ from the ceiling.
If the heater is UL Listed, then DO NOT install if the height from the floor is less than 6 feet.
If the heater is UL/CUL Listed, then DO NOT install if the height from the floor is less than 8 feet.
The heater may be at a maximum angle of 30 degrees.
All adjacent heaters must be at least 3 feet apart. Do NOT operate within 25 feet of flammable/explosive material. Heaters must never be blocked. Heaters greater than 240 volts should NOT be used for residential. The disconnection of the appliance must be incorporated in accordance with the local wiring codes. DO NOT use the appliance if the heating element is damaged or cracked.
Installation Instructions
Assembly procedure MUST be performed with NO electrical power to the unit. This heater must be permanently installed and hard-wired by a licensed electrician in accordance with electrical codes.
STEP 1: Check UL/CUL/CE label on the heater for proper voltage.
STEP 2: Wire the heaters using the wiring instructions below.
- The heater is drilled and threaded for standard 1/2″ conduit fittings. The installing electrician will need to provide the appropriate rigid metallic, flexible or liquid tight conduit for the installation location.
- Observe local electrical code regulations.
- Remove the cover plate from the junction box.
- Attach conduit.
- Use only copper wire suitable for 90°C.
- Replace cover plate.

STEP 3: Mount the heater using the mounting instructions below. Heater must be mounted with reflector angled down. Scroll down for how to Flush Mount your Infratech heater.
- These models may be chain or bracket mounted to any ceiling or horizontal surface. Installation must be such that 18″ (45.7cm) minimum clearance is maintained around the heater on all four sides and 36″ (91.4cm) directly in front. A minimum of 6″ (15.24cm) of clearance provided by mounting brackets is required behind the plane of the face. Heater can be hung using chains or custom brackets. Heater must be level, but can be rotated around its horizontal axis.

- Heater must be installed with the quartz tube horizontally level. For maximum tube life, use a carpenter’s level tool to find the optimum level position for the heater’s body. Always maintain the minimum clearances from the heater body to any combustible materials.
For Flush Mount Instructions, Check below Step 5.
STEP 4: Connect electrical components, all electrical connections must be in compliance with the National Electric Code (NEC) and local codes for outdoor wiring.
STEP 5: Use only wiring components UL/CUL/CE listed for outdoor use with IPX4 minimum rating.
Flush Mount Installation Instructions
Take a look at our flush-mount installation instruction video below for a clear understanding!
The flush mount is a popular choice among homeowners and is a great way to make your outdoor heaters look modern and sleek. Flush mount utilizes the W and WD Series heaters from Infratech. Follow the instructions below to install a flush mount or simple view the video below for step by step instructions!
Getting Started
- Ceiling must be flat and have a minimum of 2×8 studs
- Heater must be 3 feet from any fan, drapes and other fixtures.
Step 1:
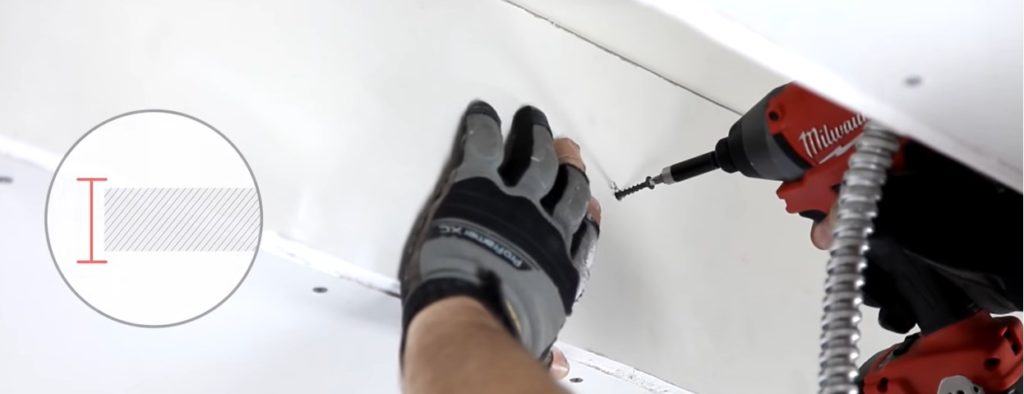
Frame the pocket with a one hour rated fire retardant drywall that will contain the heat and is at least 5/8″ thick (Type X Drywall).
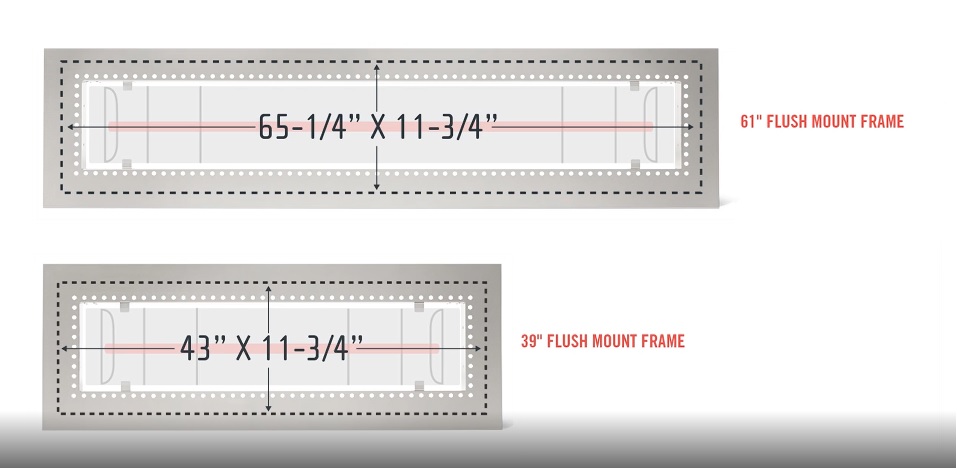
Size of finished pocket opening depends on heater size; 65 1/4 ″ x 11 3/4 ″ for the 61″ heater and 43″ x 11 3/4 ″ for the 39″ heater.
Step 2:
Mount the junction box outside of the pocket, then run the necessary wire from the power source. This is done in compliance with local building codes.
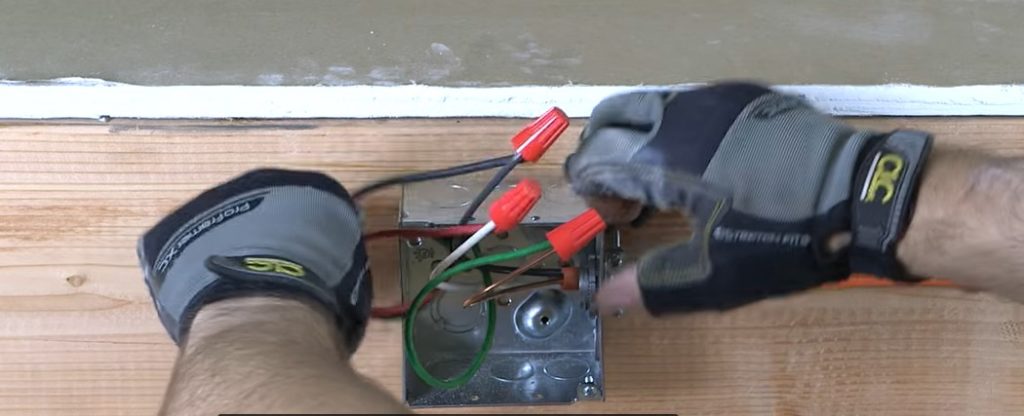
The flush mount frame comes with a 4-foot high-temperature whip that includes high-temperature wires and wire nuts.
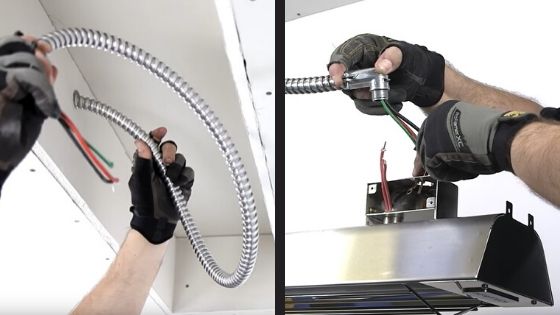
This will be connected from the outside junction box to the J-Box of the heater. Drill a hole into the upper half of the heater’s J-box before connecting the whip from Pocket to the J-Box. Secure the whip onto the J-Box and run the whip into the pocket. If necessary, you may obtain longer whips from Infratechs’ distributors.
Step 3:
Install frame into the finished pocket using one of these two methods. 1st method is to drill through the internal flanges and secure it to the inside of the pocket with wood screws that are a minimum of 2 inches. This will give the heater a nice clean look. DO NOT overtighten screws.
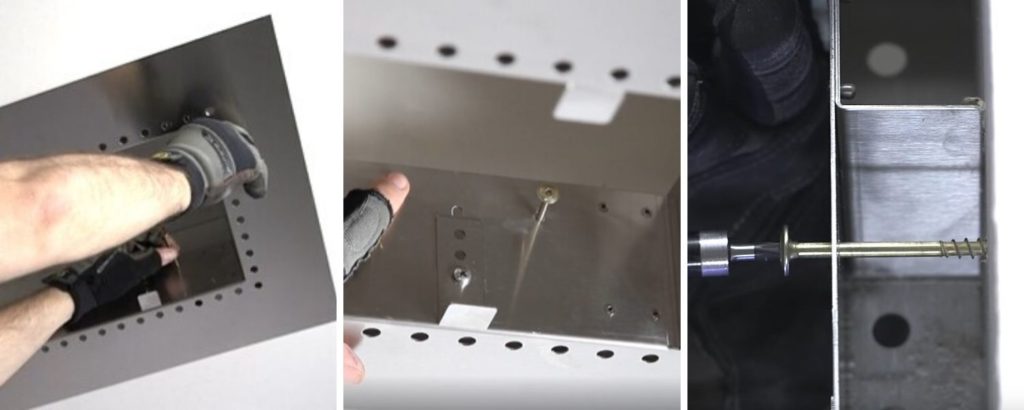
2nd method is to use wood screws to drill through the faceplate of the mount.
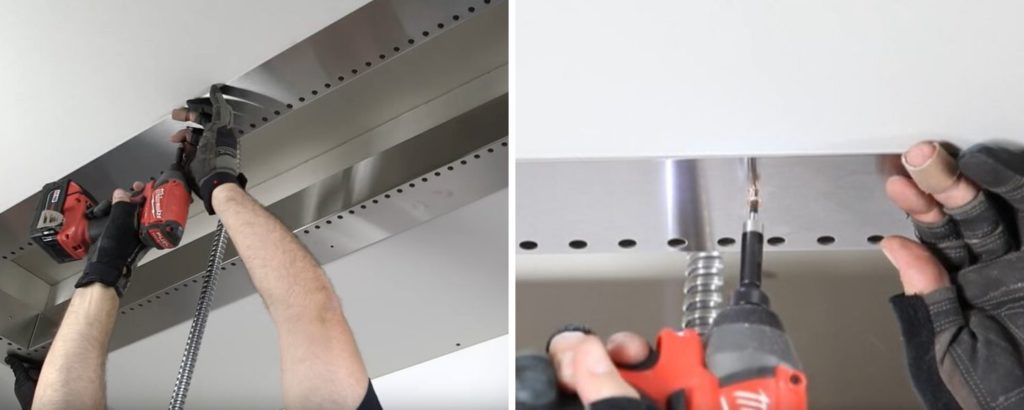
If the finish is added on top of the faceplate, leave at least 1/2″ clearance from the vent holes surrounding the heater.
Step 4:
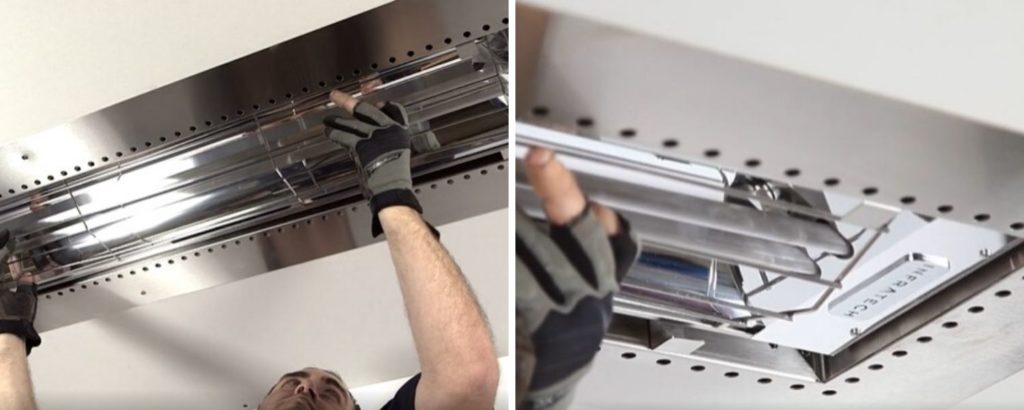
Adjust the tabs along the inside of the pocket to set the heater height. Each tab is an L bracket. The bracket will need to be connected with screws and wing nuts.
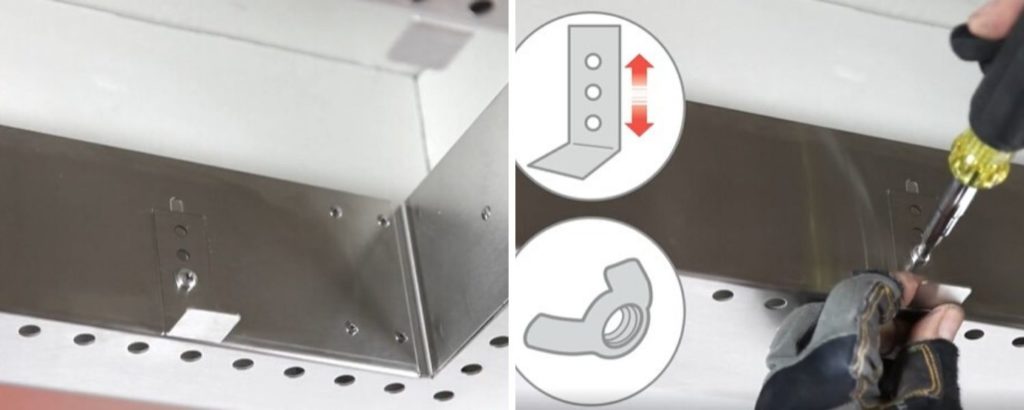
Make your final electrical connection by attaching the wick coming from the outside junction box to the heater’s J-Box using supplied high-temperature wire nuts.

Lift the heater into place and make your minor adjustments. Congratulations, you are now ready to use your new heater!
If you have any questions about the installation or specifications of Infratech heaters, feel free to take a look at the FAQ section of our site.


We recently purchased Infratech heaters and are looking for a recommendation of a good electrician to install in Brooklyn, NY